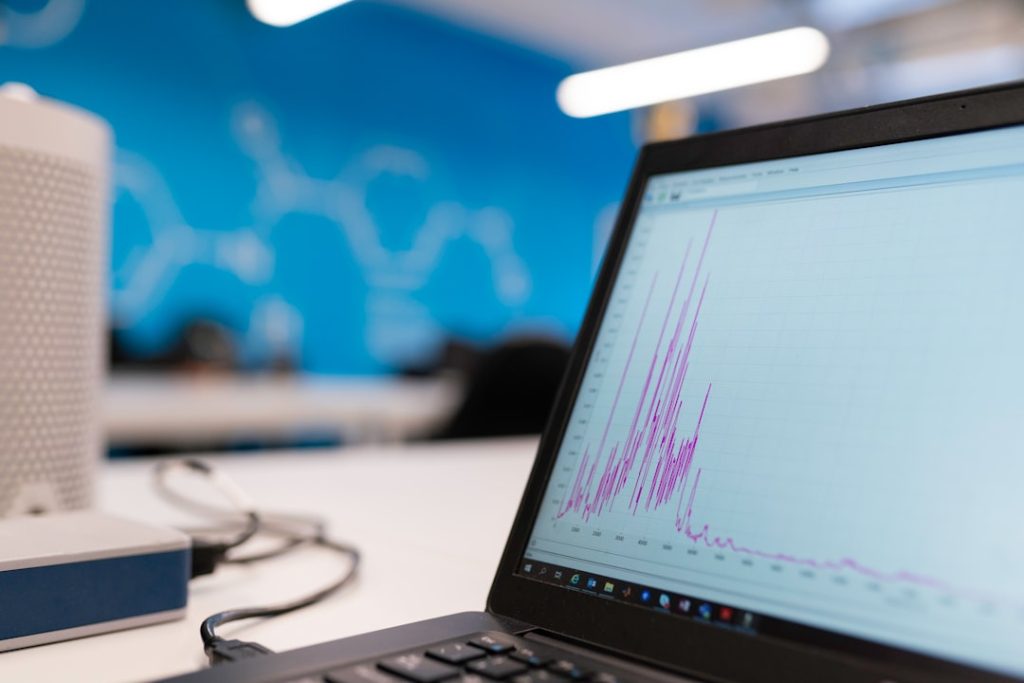
Digital audio recording is a process that transforms sound waves into a digital format, allowing for manipulation, storage, and playback on various devices. At its core, this technology relies on the principles of sampling and quantization. Sampling involves capturing sound at discrete intervals, while quantization refers to the process of converting these samples into numerical values that can be processed by computers.
The quality of a digital audio recording is often determined by the sample rate and bit depth; for instance, a common standard for CD-quality audio is a sample rate of 44.1 kHz and a bit depth of 16 bits. This means that the audio is sampled 44,100 times per second, with each sample represented by a 16-bit number. Understanding the fundamentals of sound is also crucial for anyone venturing into digital audio recording.
Sound is a mechanical wave that travels through air (or other mediums) and is characterized by its frequency, amplitude, and waveform. Frequency determines the pitch of the sound, while amplitude relates to its loudness. Waveforms can take various shapes, such as sine waves, square waves, or sawtooth waves, each producing distinct tonal qualities.
By grasping these concepts, aspiring audio engineers can better appreciate how different elements contribute to the overall sound and how they can manipulate these elements during the recording process.
Key Takeaways
- Digital audio recording involves capturing sound using electronic devices and converting it into a digital format for storage and manipulation.
- When choosing equipment for digital audio recording, consider factors such as microphone type, audio interface, and headphones to ensure high-quality recordings.
- Setting up a dedicated recording space with proper acoustics, minimal background noise, and suitable furniture can greatly improve the quality of your recordings.
- Familiarize yourself with your chosen digital audio workstation (DAW) to effectively record, edit, and mix your audio recordings.
- Implement recording techniques and best practices such as proper microphone placement, gain staging, and monitoring to achieve professional-quality recordings.
Choosing the Right Equipment for Digital Audio Recording
The Role of Audio Interfaces
The first essential component is an audio interface, which acts as a bridge between your microphone or instrument and your computer. Audio interfaces convert analog signals into digital data that can be processed by your DAW. When choosing an audio interface, consider factors such as the number of inputs and outputs you require, the quality of the preamps, and the type of connectivity (USB, Thunderbolt, etc.). For instance, a musician recording multiple instruments simultaneously may opt for an interface with several inputs, while a podcaster might only need a simple two-channel interface.
Microphones: A Critical Component
Microphones are another critical aspect of your recording setup. The choice between dynamic and condenser microphones can significantly impact the sound quality. Dynamic microphones are robust and handle high sound pressure levels well, making them ideal for live performances and loud sources like drums or guitar amplifiers. In contrast, condenser microphones are more sensitive and capture a broader frequency range, making them suitable for vocals and acoustic instruments in controlled environments.
Additional Essentials for Quality Recordings
Additionally, investing in quality cables and stands can prevent unwanted noise and ensure stability during recording sessions.
Setting Up Your Digital Audio Recording Space

Creating an optimal recording environment is essential for capturing high-quality audio. The acoustics of your recording space can greatly influence the final product.
This can be achieved through various methods, such as using acoustic panels to absorb sound or bass traps to manage low frequencies. Positioning your microphone correctly is also crucial; placing it too close to walls or corners can lead to undesirable resonances. In addition to acoustic treatment, consider the layout of your recording space.
Ensure that your equipment is easily accessible and that you have adequate lighting to create a comfortable atmosphere. If you’re working with multiple musicians or collaborators, having enough space for everyone to move around freely can enhance the collaborative process and lead to better performances.
Getting to Know Your Digital Audio Workstation (DAW)
| DAW | Features | Compatibility | Price |
|---|---|---|---|
| Pro Tools | Advanced editing, mixing, and recording features | Windows, macOS | Subscription-based |
| Logic Pro X | MIDI and audio recording, virtual instruments | macOS | One-time purchase |
| Ableton Live | Live performance, creative composition tools | Windows, macOS | Subscription-based |
| FL Studio | Pattern-based sequencing, music production tools | Windows, macOS | One-time purchase |
A Digital Audio Workstation (DAW) is software that allows you to record, edit, mix, and produce audio files on your computer. Familiarizing yourself with your chosen DAW is crucial for efficient workflow and creative expression. Popular DAWs like Ableton Live, Pro Tools, Logic Pro X, and FL Studio each have unique features and interfaces that cater to different styles of music production and audio editing.
For example, Ableton Live is favored by electronic music producers for its intuitive session view and real-time performance capabilities, while Pro Tools is often regarded as the industry standard for professional studios due to its powerful editing tools. Navigating your DAW involves understanding its various components, such as tracks, channels, plugins, and effects. Tracks are where you record audio or MIDI data, while channels control the routing and mixing of these tracks.
Plugins are software tools that add effects or virtual instruments to your recordings. Learning how to use these features effectively can significantly enhance your production capabilities. Many DAWs offer extensive tutorials and user communities that can help you get acquainted with their functionalities.
Recording Techniques and Best Practices
When it comes to recording techniques, preparation is key. Before hitting the record button, ensure that all equipment is set up correctly and functioning properly. Conducting sound checks allows you to adjust levels and gain settings to avoid clipping or distortion during recording.
It’s also beneficial to establish a clear plan for each session; this includes knowing what instruments will be recorded first and how many takes you intend to capture. One effective technique is to use a click track or metronome during recording sessions. This helps maintain consistent timing across multiple takes and ensures that all elements fit together seamlessly in the final mix.
Additionally, consider using headphones while recording to prevent bleed from speakers into microphones. This isolation allows performers to hear themselves clearly without interference from other sounds in the room.
Editing and Mixing Your Digital Audio Recording

Editing Phase
Once you’ve completed your recordings, the next step is editing and mixing them to create a polished final product. Editing involves cleaning up tracks by removing unwanted noise or mistakes, aligning performances for tighter timing, and adjusting levels for consistency across all elements. Most DAWs provide tools for cutting, copying, pasting, and moving audio clips easily within the timeline.
Mixing: Where the Magic Happens
Mixing is where the magic happens; it involves balancing levels between different tracks, panning sounds across the stereo field, and applying effects to enhance the overall sound. A well-mixed track should have clarity and depth, allowing each element to shine without overpowering others.
Techniques for a Balanced Mix
Techniques such as EQ (equalization) can help carve out space for each instrument in the mix by boosting or cutting specific frequency ranges. Compression can also be used to control dynamics and ensure that louder sounds do not overshadow softer ones.
Adding Effects and Enhancements to Your Digital Audio Recording
Effects play a significant role in shaping the character of your audio recordings. Common effects include reverb, delay, chorus, flanger, and distortion. Reverb simulates the natural reflections of sound in a space, adding depth and ambiance to vocals or instruments.
Delay creates echoes that can enhance rhythmic elements or add texture to melodies. Understanding how to use these effects effectively can elevate your recordings from basic tracks to immersive listening experiences. When applying effects, it’s essential to use them judiciously; over-processing can lead to a cluttered mix that detracts from the original performance.
Experimenting with different settings allows you to find unique sounds that complement your music style while maintaining clarity. Many DAWs come equipped with built-in effects plugins, but there are also numerous third-party options available that offer advanced capabilities for those looking to expand their sonic palette.
Exporting and Sharing Your Digital Audio Recording
After completing your editing and mixing process, it’s time to export your digital audio recording for sharing or distribution. Most DAWs provide various export options depending on your intended use—whether it’s for streaming platforms, CD production, or personal sharing with friends or collaborators. Common formats include WAV for high-quality audio files or MP3 for compressed files suitable for online sharing.
Before exporting, ensure that you have set appropriate levels for mastering; this involves adjusting the overall loudness of your track while maintaining dynamic range. Once exported, consider how you will share your music with others—whether through social media platforms like SoundCloud or Bandcamp or by submitting it to music distribution services for wider reach on platforms like Spotify or Apple Music. Engaging with listeners through these channels can help build an audience while providing valuable feedback on your work.
In conclusion, mastering digital audio recording requires a blend of technical knowledge and creative intuition. By understanding the basics of sound and digital technology, choosing the right equipment, setting up an effective workspace, familiarizing yourself with your DAW, employing best practices in recording techniques, editing meticulously, adding thoughtful effects, and sharing your work strategically, you can create high-quality audio recordings that resonate with listeners across various platforms.
If you are interested in learning more about digital audio recording for beginners, you may also want to check out this article on


